Table of Contents
Last Updated on September 11, 2021 by John Patterson
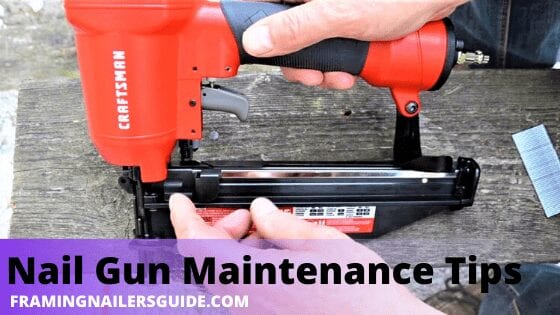
Having a nail gun or nailer is a smart investment, especially if you are into DIY construction or home improvement. For example, a brad nailer or a pin nailer will help you with lightweight projects around your home, whereas a flooring nailer will come in handy when installing a hardwood floor.
However, just like any other power tool, nail guns are bound to get rusty and old at some point. As such, it is essential to undertake a regular maintenance schedule to keep them running as they are supposed to for an extended period.
If you observe that your nail gun is jamming frequently or firing air or double firing, then it’s time for some maintenance to get your nail gun back in shape. The type or level of maintenance depends on the type of nail gun. For example, pneumatic models require regular maintenance than cordless ones because an air compressor powers them; hence, they are exposed to more tears and wear.
Nail Gun Maintenance Tips: Cleaning and Lubrication
Here’s the recommended list of Nail Gun Maintenance Tips for you.
#1. General cleaning
Cleaning helps to prevent dirt, debris, and other substances from clogging or damaging your nail gun. You can use a clean rag to wipe down the machine after every use. As for the air filter, it should be removed and cleaned after every two days if you are using the gun daily.
If you only use the tool occasionally, the filter should be cleaned after every use to keep the dirt and debris in control. Most filters can be cleaned with water and mild soap but ensure to check the user manual for cleaning specifications.
When it comes to the motor, your attention should be on the impeller blade. Use, brush, aerosol, and a piece of cloth to clean the blade and to wipe out any leaked lubricant.
#2. Clean and lubricate the feed system
Cleaning the feed system regularly will keep your nail gun in check. You can use a can of compressed air to blow out dust and debris that might be present in your feed system. You can also use a clean rag to wipe down the system, but you must be careful so as not to leave behind fabric pieces that might clog the feed system. Oil can also be effective, although it tends to leave debris in the system. However, to avoid this, ensure to get the right nail gun oil.
#3. Keep the trigger clean and lubricated
You cannot operate your machine if the trigger is stuck. How fast you work, and the general performance of the nail gun will depend on whether the trigger is jammed or not. As such, you should check the trigger regularly to make sure it operates as needed if not oil it and tighten any loose screws.
#4. Lubricate the air fitting as needed
The air fitting is a crucial part, and you’ll need to oil it regularly if you are using the nail gun daily. For best results, apply 4 to 5 drops daily. This amount should be enough to get your gun running for long hours. The air fitting has several O-rings inside, and you’ll need to keep them lubricated; you can lubricate them using your fingers. However, always ensure that the power is cut off, and there are no nails in the gun before putting your fingers inside to avoid serious injuries.
#5. Use the right nail oil
Always use lubricating oil that is designed for use in nail guns. You should never apply lubricants that are not meant for this purpose, as this can damage your nail gun. Also, you should not use too much oil in the nail gun because it may start to leak or become too slippery to operate. As such you need to calculate when exactly you need to oil your nail gun.
Pneumatic oil is the most preferred, but you’ll need to consider nail gun operating temperature and the climate for efficiency. This simply means that nail gun oil for winter should be different from that of summer. The type of lubricant you choose for your nail gun is crucial as some lubricants may not work with nail gun components, especially rubber parts. For example, oils such as WD-40 should be avoided as they are not only ineffective but also speed up the death of your unit.
#6. Lubricating your nail gun
First thing fast, you should keep in mind that safety is paramount anytime you are oiling your nail gun. Before getting started, ensure to disconnect the nail gun from the power supply, i.e., like an air hose, and that the nail gun is empty.
While holding the air hose connector in an upright position, add few drops of the recommended oil through the air inlet port and re-connect your machine to the air hose. Pull the trigger several times to help spread the oil throughout the machine.
Check the condition of the oil been discharged, and if it is still dirty, repeat the process until the oil comes out clean. This will not only help to lubricate the operating system, but will also help to keep the inside as clean as possible, thus extending the lifespan of your machine. Ensure that you apply enough oil to the gun’s moving components and the air fitting. At this point, you are ready to reload and go back to work. Consider applying oil several times throughout the day if the gun is used all day long. However, if you don’t use the nail gun often, limit the lubrication to once a while for improved efficiency.
Watch the below video for easy nail gun maintenance:
In Conclusion
Cleaning and lubrication are some of the best ways to prevent nail gun failure. These maintenance practices help to keep water out of the system as well as protecting inside components from rust that could clog the feed system. Also, if you want your nail guns to keep running just as they were new, you’ll need to ensure regular cleaning and lubrication.
However, remember that some nailers require more maintenance than others, so it is important to follow the user manual before using them, and with the above cleaning and lubrication tips, you should be able to keep your nailer running and at peak performance for years.

