
Table of Contents
FramingNailersGuide is reader-supported. If you buy an item through the links on this site, we may earn a small commission at no extra cost to you. Learn more
Last Updated on April 25, 2021 by Mamunur Rashid
There are dozens of Brad nailers are available in the market. So it was also a frequently asked question to our research team what is a Brad Nailer?
Honestly speaking, before buying the tools our team even didn’t know using an 18-gauge brad nailer properly for our DIY prooject.
We bought more than a hundred nail guns before writing, editing, making comparison tables, and infographics.
Our research team interviewed five experts before writing the reviews of brad nailer, pin nailer, framing nailer, and roofing nailer. We also researched Brad nailer vs Finish nailer.
As a DIY handyman enthusiast, you’ve probably already tried a myriad of instruments on your journey to making your home or business ideas come true.
You’ve probably also used a finish nailer more times than you can count. So, is that what a brad nailer is – a tinier version of a finish nailer?
Yes and no. Both instruments, while very similar in their functions, complement each other and ensure that your renovation or builder’s project is done right from start to finish.
Below, we explain what is a brad nailer is and how to use it to its fullest potential in your next DIY handyman project.
What Is a Brad Nailer? What is a brad nailer used for?

A brad nailer is essentially the finish nailer’s cousin.
Smaller in size and slightly less powerful, it’s usually used to attach anything from pictures to small moldings or trims securely. Since the tool doesn’t deliver that heavy of an impact, it’s often used to nail more fragile boards or trims that could otherwise split under the sheer force of its stronger relative, the finish nailer.
Another big plus in favor of the brad nailer is that it uses 18-gauge brads (brad nails), which are much thinner than the 15 and 16-gauge variations used on finish nailers. The smaller nail size will result in lower holes, so you will rarely need to use wood putty as a touch-up.
However, their holding power pales in comparison to the nails used in finish nailers, which means that you will be much less likely to use the tool when performing any structural work.
Types of Brad Nailers
Today in the market, you can choose between two kinds of brad nailer models – pneumatic or cordless. Do you know Cordless vs Pneumatic nail gun: What’s the best?
The pneumatic models operate via a hose-to-air compressor, while the cordless nailers are a blend between a compressed air canister and a rechargeable battery.
Another thing to consider is the way in which the brad clip positioned. For instance, the “classic” models have a straight clip, meaning that it is perpendicular to the driving cylinder.
Angled brad nailers, on the other hand, feature clips that placed at an angle. It makes them perfect for when you need to hammer in a series of nails in trying to reach spots.
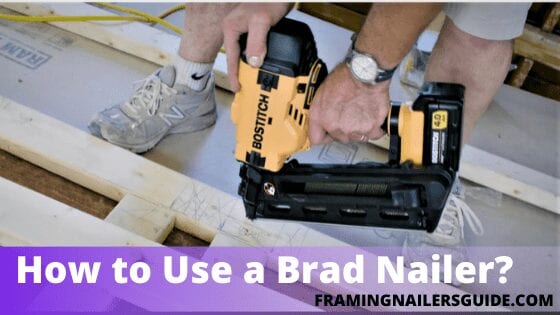
How to Use a Brad Nailer? Tips From a Real User

Well, using a brad nailer isn’t exactly rocket science, there are a few things you need to consider before putting your new purchase to good use.
Here are some pointers you should follow to learn how to take full advantage of your tool in the safest manner possible.
- Avoid placing brads too close to the rim of a wooden board. It is not only impractical but may also split the board and damage it beyond repair.
- If you have a bent brad, don’t use a hammer to pound it all the way in. Since this will bend the brad even further, the better course of action is to remove it entirely.
- Check your nail clip often. When everything in your project goes just right, it’s easy to forget to reload the clip.
- It is an excellent habit to have since many brad nail models will continue to fire even if the clip is empty, and the substantial driver-to-surface impact may chip the wooden material. If this happens often, it can also damage the tool itself!
- Ease your grip when pressing the trigger. Each fired nail will cause the tool to recoil slightly. If you push the device down with force to keep it steady, the nailer’s nose will hit the workpiece again and can result in a dimple near the hole.
- To avoid this, make sure to apply just enough pressure to keep the nailer in place, depending on its weight.
- Never use brad nailer on hardwoods. Most hardwoods, such as plywood or MDF, will be difficult to pierce due to the brad nail’s thinness.
- Instead of forcefully trying to make things work, conserve your brads and use a finish nailer instead.
Brad Nailer Safety Tips
Due to the smaller size of the tool and its brads, it is safe to say (pun intended) that it is pretty harmless. However, that doesn’t mean you should forget all safety precautions on the worksite.
For example, if you work in confined areas and your model has a loud compressor, make sure to invest in a decent pair of plugs to protect your hearing from bouncing sound waves.
Safety glasses are another must-have to keep your eyes shielded from rogue brads. And always keep tabs on your clothing’s loose ends to avoid nailing them to your workspace.
A Few Important Words of Brad Nailer Wisdom
Now that you know what a brad nailer is and how to use one, what are some of its practical applications? Let’s have a look at a few of the things you can do with this tool in your toolshed.
- Brad nailers are perfect for rejuvenating anything from loose wooden trims around your windows to the shaky mortise joints of your inherited antique furniture in your living room;
- You can use a special nosepiece attachment to leave the brad heads exposed. This gives you plenty of room for creativity (mandala with colorful strings comes to mind);
- The days of using tape to measure the distance between both holes in your picture are over. Merely place the frame on your desired wall spot, take the brad nailer, and shoot!
- When all else fails, and the brads are unable to pierce the surface, you can use the tool to hold the trim piece or wooden board in place while you search for your finish nailer.
Extra tip: Invest in a reasonable level to ensure that your brad nailer delivers accurate results.
What odd jobs can you handle yourself? Here’s a dash of tips from the Fantastic Tradesmen:
- You can hang pictures, mirrors, and wall art yourself!
- You can hang wall shelving, cupboards, or other wall-hung furnishing or decorations yourself!
- You can hang rails and mount hangers in your bathroom or kitchen yourself!
- You can add a dash of sturdiness when assembling flat-pack furniture yourself!
- You can install new blinds and curtains yourself!
- You can fit kitchen worktops yourself!
- You can install your bath and shower screen yourself!
- You can even fix a ceiling fan yourself!
- You can install a door and nail the hinges yourself!
- You can assemble a garden shed yourself!
- You can mount and fix outdoor lighting yourself!
And the list goes on. A good brad nailer can be an invaluable tool especially once you gather a bit of experience and get the hang of using one.
In Conclusion
Finally, we are more than happy that you know using a brad nailer? If you have any questions, advice, and suggestions, please let us know by commenting here.
