Table of Contents
Last Updated on April 28, 2021 by John Patterson
Installing a sliding barn door comes to be quite hectic for someone with no expert hands. But if you are a DIYer yourself, that should be an entire thrill for you.
However, the process needs a few tools including the top-quality barn door hardware kit and a perfect method to follow. And this process is what today’s post is all about. Go through the steps and learn how to install an exterior sliding barn door.
Let’s get rolling-
How to Install an Exterior Sliding Barn Door: Step-by-step guide
Installing the sliding barn door is quite a complicated project. And it is hard to do it yourself if you are alone. Our advice is to get a few helping hands to give you hands in the process.
Also, there are some tools needed along with a wall stud. The tools can be split into two parts- the hand/power tools and the hardware supplies. We are giving a list of those tools. Here you go-
The hardware supplies needed-
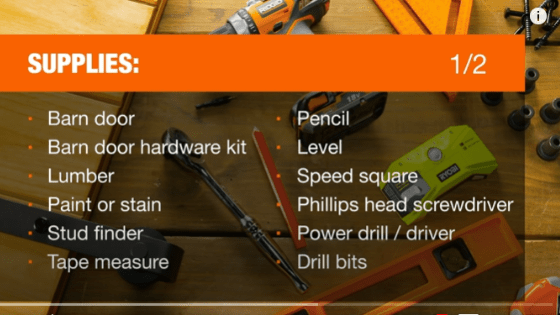

- Pocket hole screws (1-¼ inches coarse thread).
- Brad nails of 1-¼ inches.
- A barn door track kit.
- Wooden glue.
That was about the hardware supplies. Now here are the power tools and hand tools required-
- A drill or driver.
- A quality miter saw.
- A pocket hole jig.
- A carpenter’s square or speed square.
- Tape measuring tools.
- A suitable sander.
Make sure that you have all of these tools, and proceed to the steps.
Step 1: Make sure that the board is all assembled
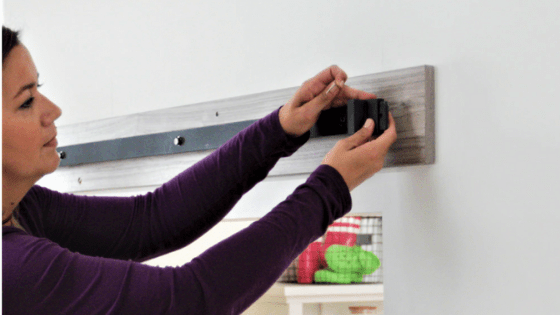
Before you begin with setting up the sliding barn door, make sure that the barn door is correctly assembled. As an example, if the opening is 30 inches in dimension, rip the board to its width.
While measuring the barn door according to the door opening, keep a gap of at least half inches. This gap of half inches is for the adjustment.
Next on, place the blocks by the edges outwards, and gang the boards sidewise. As you are done, you have to use the long bar clamps. Then, square up the entire assembly at both of the top and bottom edges. Lastly, screw up the blocks and strap them on the place. Remove the clamps as you are done.
Step 2: Cut the filler strips
At this step, you need a miter saw to cut filler strips. Make sure that the cut is according to the cut. Add adhesives on the rail-top flush. The rail-top is located at the top of the boards. Next on, adhere the upside stiles right underneath it. While adhering, use a deck screw of about 1 inch.
Step 3: Attach the mounting board
You might have got a mounting board before getting into the process. At this stage, you have to attach the mounting board.
Before that, nail the mounting board to the joist or stud inside the pole barn. While doing that, the mounting board is a little bit larger compared to the size of the barn door rails. The benefit of it is, it will make sure that the barn door can sustain the right amount of weight that the sliding barn door will convey.
Step 4: Assemble the barn door track
Make sure that the supports are correctly attached, and proceed to assemble the barn door tracks. There should be manufacturer instructions provided for executing the process.
After you are done, mark a straight line across the line where the track will be attached to the mounting board. You can use a carpenter’s level to do that.
Step 5: Drill and assemble the rollers
Before starting this step, make sure that you have conventional eyeglass to protect your eyes. You need to create pilot holes right on the mounting board. As you are done with selecting the places to drill the holes, drill each of them with a drill machine.
Then, attach barn door rails along with the mounting boards. While assembling them, make sure to maintain proper alignment. Now, attach the rollers at the place which is on top of the sliding barn door.
Sometimes, you may need to connect the rollers to the bottom position as well. Make sure that it is included in your kit box.
Step 6: Test whether it is done or not
Now, this is the most critical part of the whole process of installing an exterior sliding barn door. Because you have to climb the ladder, and also you need to have support on the barn door.
The support is needed to guide the roller right on the track. In this case, you may call up a couple of your friends to help you up. Also, repeat the same process if you have any additional sliding doors.
Step 7: Test whether the door is set or not
By now, the barn door should be able to operate as a slider. But that’s not the end of the process. You need to put stops that will keep the barn door from sliding off the place.
As you know, the tracks are quite slippery, and the stops are there to protect that. After placing the stops, let the sliding barn door strike on it and give you the scope to check the strength of the stops.
Frequently Asked Questions
#1: How to make a barn door track?
Answer: Making a barn door track is all about the measurements. For that, you have to start with measuring the door opening, and that will be the barn door width. Afterward, you need to prepare the door and set it up on the track.
#2. How to install a barn door track system?
Answer: A track is nothing but the track itself. Measure the track and add essential deviations to get the final barn door size. And you have to make the door according to the size.
Let’s watch the video to know how to build and install a sliding barn door:
In Conclusion
As these following steps are concerned in this exterior sliding barn door installation guide, the process is hard to do by oneself. If you have a few helping hands, the process would be way more natural to conduct. Also, make sure that the tools are operating correctly. And the most important part is cutting the barn door according to the size of the door opening.
Good luck!
