Table of Contents
Last Updated on November 16, 2024 by John Patterson
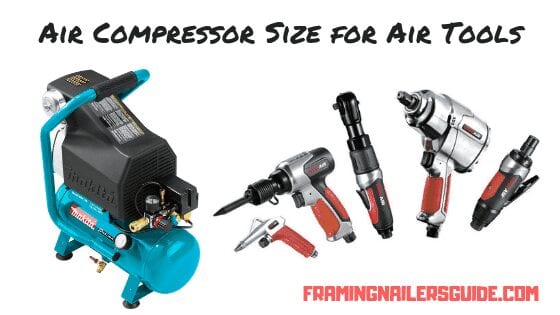
Pneumatic air tools require quite some expertise along with the right source of air. And when it comes to an air source, air compressors are the best-known options.
But the real trouble that begins for a pneumatic tool rookie is when he gets to select one air compressor for his air tool. There are tons of size variations, output parameters, and setup types, and of course, price points.
But worry not my friend. We’ve crafted an entire guide on how to figure out the right size of air compressor for your air tools-
What Size Air Compressor Do I need for Air Tools
What Sort of Project you’re up to?
When it’s about air tools and the works that you do with them, there are both light and heavy types of chores. Tools like air hammers are quite more comfortable and less demanding, where tools like impact wrench demand a lot more power from the air compressor.
So, make sure that what types of projects you are going to do with the tools. Is it just household maintenance or large construction projects? If it’s a light chore-like backyard repairing, you can do fine with a portable compressor.
For commercial and industrial works, you need a wheelbarrow or stationary compressor instead.
What’s Your Air Tool Type?
Just a while ago, we were talking about different types of air tools, and their differences in terms of demand for compressed air. This is in fact, one of the determinants of the question we’re concerned about.
If you have light air tools like an airbrush, air hammer, sandblasters, the required compressor will be quite small and less expensive.
On the other hand, if the tools like brad nailer, air nailer, impact wrench, angle grinder, jackhammer, the requirement of air compressor power are going to be much more. The cost will follow by, for obvious reasons.
What kind of power source do you have available?
To run compressors, you need to equip electric or gas power. Compressors for household or non-commercial purposes are run well on 120V home outlets. In the case of some larger compressors, you need a 220V power source. But the excellent fact is most of the compressors which come with 220V compatibility, also have compatibility with 120V power as well.
An alternative to an electrically powered compressor is a gasoline-powered one. Especially, when you don’t have an AC power outlet onto a remote site, gas-powered compressors will come in help. But they are likely to provide less output and have a lot of maintenance costs.
How much space do I have?
Space does matter in the case of air compressor selection, and that’s also related to many other related parameters.
Take the tank capacity as an example. If you want to load more compressors for use at a stretch, it will take a larger tank. But if you’re okay with a 6-gallon pancake compressor, it will fit within any garage.
Make sure how much space you can allow your compressor to occupy, and chose the model according. In case you don’t want to be stationary with the compressor, you can go for a wheelbarrow or portable compressors which can be moved from to place.
Where will I be using it?
Tank size
In the list of air compressor specs, the most versatile term will be its tank size. We mean, you will be given a choice range from 1 gallon to over 60 gallons, and choosing the right one is always hard.
So, what does the tank size tells you about the compressor’s functionality?
Well, it indicated the amount of compressed air it can hold up and deliver that while working with air tools. Afterward, when the tank air is finished, the motor has to work again to produce compressed air over again.
Some air tools require a constant supply of compressed air. Some of them are grinders, sanders, etc. So, they will need a larger air compressor tank size in action.
Tools that require a lower amount of compressed air operate in short bursts. So a few gallons of compressed air will be sufficient for a session for these tools. You can recognize these sorts of air tools in the form of framing nailer, brad nailer, etc. On top of that, this sort of air compressor has less reloading time and less power requirement as well.
Therefore, all you need is the determination of the type of tools you are going to use with the compressors. If it’s the occasional air tools of small or medium chores, then a portable, pancake compressor of 1-6 gallons will do the job.
In case you need a constant supply of compressed air for a long period, you can choose from up to 60 gallons of air tank size. But remember that, the cost and the power expense will be higher on a proportional basis.
Related Reading: Oil vs Oil-free air compressor.
Air Tool CFM Requirements
If you have been up to air compressors for quite some time, the term CFM won’t be unfamiliar to you. What it stands for is Cubic Feet per Minute, which has another form called SCFM (Standard Cubic Feet per Minute). To understand the air compressor requirement for your air tool, you have a smart insight into this terminology.
See, every tool has a minimum CFM requirement to run. You can find the number on its body or the manual. And the compressor you will connect with it should meet that CFM requirement at any given condition. And that’s a rule of thumb.
But here is the catch-
The CFM of air compressors changes with the pressure the air is coming out at. If you see a label with “4 CFM at 90 PSI’ on a compressor, it means that it can produce 4 CFM of airflow when the air pressure is 90 PSI. And the pressure (psi) has several choices in every air compressor.
So, how would you calculate the highest CFM requirement and match that with the CFM of your compressor? The formula is simple. Take the highest CFM rating of the air tool you are working with. Now, multiply that by 1.5, and you can get the CFM requirement of the tool.
Once you have the number in hand, go for a compressor that contains the given CFM with a given pressure.
Note: Keep in mind that, air pressure reduces to some extent due to the hosepipe connected to it. So, all of the CFM values won’t reach your air tool. If your hose length is going to belong, take that into account as well.
The CFM Chart for Generally Used Air Tools
We will make things a bit simpler with a standard chart of required CFM for mostly used air tools.
Before heading into the list, let’s remind you that, these tools are taken with a 25% duty cycle. If you’re sure that your tools have continuous usage, you have to multiply these CFM values by 4. If the tools are in half-duty cycle, you have to increase these numbers by 2.
Have you got the math? Let’s proceed to the chart-
| Name of Air Tool | CFM @ 90 PSI (Average) | Operating PSI |
|---|---|---|
| Air Hammer | 4 CFM | 90-100 PSI |
| Angle Grinder | 5-8 CFM | 90-100 PSI |
| Blow Gun | 2-3 CFM | 90-100 PSI |
| Brad Nailer | 0.5 CFM | 70-90 PSI |
| Die Grinder | 5 CFM | 70-90 PSI |
| Disc Sander | 20 CFM | 90-100 PSI |
| Drill | 4 CFM | 70-90 PSI |
| Framing Nailer | 2 CFM | 100-130 PSI |
| Grease Gun | 3 CFM | 120-150 PSI |
| Hydraulic Riveter | 4 CFM | 90-100 PSI |
| Impact Driver (1") | 12 CFM | 90-100 PSI |
| Impact Driver (1/2") | 4 CFM | 90-100 PSI |
| Impact Driver (3/4") | 7 CFM | 90-100 PSI |
| Impact Wrench (1") | 10 CFM | 90-100 PSI |
| Impact Wrench (1/2") | 4 CFM | 90-100 PSI |
| Impact Wrench (3/8") | 3 CFM | 90-100 PSI |
| Orbital Sander | 6-9 CFM | 70-100 PSI |
| Paint Spray Gun | 4-8 CFM | 90-100 PSI |
| Ratchet (1/4") | 3 CFM | 90-100 PSI |
| Ratchet (3/8") | 4 CFM | 90-100 PSI |
| Speed Saw | 4 CFM | 90-100 PSI |
| Tire Inflator | 2 CFM | 125-150 PSI |
Air quality
In every practical application of compressed air, air quality plays a significant role. It indicates the inclusion of contamination into the compressed air. The types of contamination we’re talking about can be water vapor; water vapor in a semi-liquid form, oil in aerosol form, dust, etc.
Based on the area you’re using this compressed air, these substances can leave a little to severe and adverse impacts. It will, however, increase the overall cost of the operation as well.
So, before selecting the compressor, make sure it comes with the right air quality. The presence of air filtration is quite essential in this regard. Make sure the air is filtered well before taking it into the compressor process.
Sometimes, particles sizing from 0.1 micrometers to 0.2 micrometers can hard be separated through general filtration processes in the air compressors. As long as your air tool is up to regular works, you can overlook such a micro-level of air filtration.
Sizing an Air Compressor (step by step)
To bring out the right amount of air at the correct pressure, sizing the compressor has no alternatives. Here are the steps to the process-
Step 1
Figure out how much air pressure (CFM) your air tool requires. The simple tool of doing that is to divide the highest CFM rating with 1.5. Also, you can pick that up from the manual of your tool.
Step 2
Once you’re done with step 1, make sure the number of the air tool is definite. After the sizing, you can’t increase it anyway.
Step 3
Determine the duty cycle of the air tool by now. As an example, if the tool works for 40 seconds every 100 seconds, the duty cycle is 40%.
Now, multiply this percentage with the required CFM from the previous step. You will get the amount of CFM that you have to bring out from the compressor.
Step 4
Figure out the psig of the compressor, which is 90-100 in the case of most models. But some of the compressors can be of 150 psig as well.
Step 5
Now, check out the voltage requirement of the compressor, and the voltage of the outlet you’re going to power the compressor with. If you’re not sure, call up an electrician instead.
If that matches with each other, we’re done with the steps of sizing our air compressor.
In Conclusion
Buying the right air compressor for the right tool is not an instant job. It takes hours of researches on the technical side, and a day-long analysis of the market. Hopefully, this complete guide will be the handbook when determining what size air compressor you need for air tools.
Best of luck!

