Table of Contents
Last Updated on April 16, 2024 by John Patterson
It’s trivial.
Yeah, the difference between spokeshave and drawknife is trivial. But even this little difference is crucial if you’re into woodworking.
Most people can’t even tell apart these two tools at first glance. But it’s super important to know the differences between these two. Because in the case of pitch-perfect woodworking, these differences do matter.
Moreover, you might benefit more from using one tool in a particular situation than using the other.
Long story short, you should have a clear concept about spokeshave vs. drawknife. It’s not a must. But knowing the differences might help you in the long run.
Here, we have explored the differences in a very systematic way. At first, we get to know each of the tools; in the end, we’ll bring out specific pros and cons.
Now, let’s jump right into the details-
Spokeshave vs. Drawknife: Comparison
What is Spokeshave?
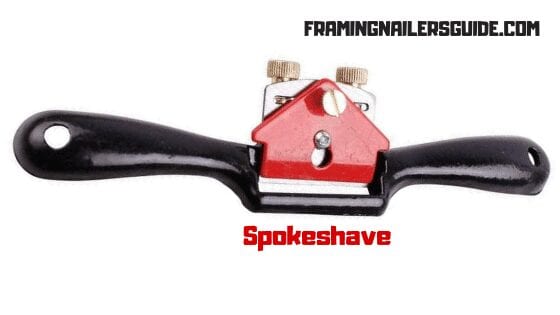
A spokeshave is a woodworking tool specially designed for shaving and trimming wood. Chair legs, wheel spokes, arrows, bows, boat paddles (Kayak and Canoe), etc. items are generally made with this tool.
If we go to the origins of this tool, then we’ve to go to ancient times. This tool dates back to the prehistoric age. Back then, this tool was made out of sharpened stones. Around the 16th century, this tool got modernized. People started using this tool for creating wooden wheel spokes. Asa a result, it got its name, Spokeshave.
The spokeshave has two handles extended from the middle. This gives the tool a wing-like shape. Another part of the spokeshave is called the sole.
This only part connects the tool with the working wood piece. There’s a slot in the sole, often referred to as the mouth. The mouth is dedicated to holding blades.
But there’s a catch-
There are several types of spokeshaves. But it’s not this simple. There are three types of blades and four types of soles.
The blade types are- flat, conclave, and convex. And the only types are- flat, round, concave, and convex. After combining all these, we get four types of spokeshaves. All these spokeshaves are used for different purposes.
How to Use a Spokeshave?
Before using the spokeshave, you first have to figure out if it’s a push stroke or a pull stroke. This depends upon the blade and only type. Once you’re done with that, it’s time to get deeper.
Here we will only explore the pull stroke for a spokeshave.
- Hold your spokeshave firmly. An easy way to do that is by holding the handles between first the two hand fingers while keeping the thumb behind the blade.
- Place the spokeshave sole on the flat surface of the wood.
- Pull your spokeshave carefully towards you while keeping it in touch with the wood surface.
- Apply slight pressure downwards while pulling.
Keep on doing this while keeping your intended wood shape in mind.
If you have a push spokeshave, then the process becomes slightly different. Just push it instead of pulling.
Do you push or pull a spokeshave?
Answer: You can use a spokeshave for both push and pull.
What is a Draw Knife?
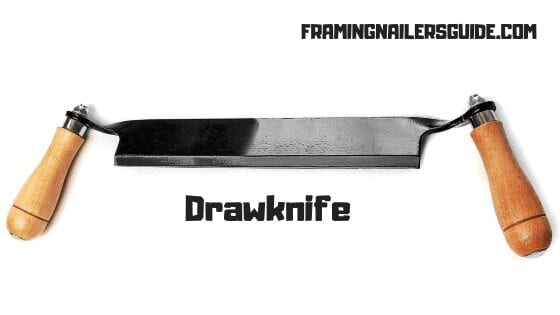
The drawknife is a long blade positioned between two handles. With this blade, you can slice the wood thinly and in a chunk. The blade can be both straight and curved.
Basically, the whole tool looks like a bicycle handle.
There are two types of drawknives. Straight and curved. However, you can use the straight and curved blades interchangeably. A curved blade is best for projects with a lot of hollowing. For example, if you’re up for making a chair, then a hollowed drawknife would be the best option.
How to use a Draw Knife?
There are two ways of using a drawknife. These are angle up and bevel down. If you’re up for thin cuts, bevel down is your way. On the other hand, if you need higher control and deeper cuts, then beveling up is the thing for you.
Now let’s look at the process-
- Sit on your shaving horse and secure your working wood piece.
- Hold down the draw knife by using the two handles. Make sure that the blade is facing you.
- If you’re in Bevel down mood, place the blade’s flat side against your wooden surface.
- Draw the blade towards you carefully.
Keep doing this till you have your desired shape.
Pros and Cons of Spokeshave and Drawknife
Like every other tool, these two have pros and cons. Here we will discuss the practical pros and cons of these tools. The advantages and disadvantages that you’ll have while working with these. So, let’s cut deeper-
Pros and Cons of Spokeshave
-
- Spokeshave comes with an easy control feature.
- It provides precise and refined work output.
- It requires little to no maintenance.
- It allows you to reach complex surfaces. For example, edged and cylindrical wooden pieces.
- As this tool makes smaller and finer cuts, it is pretty time-consuming.
- It is a bit low on the versatility scale.
Pros and Cons of Drawknife
-
- Drawknives are versatile. You can shave as thin or thick as you want.
- You can remove the shavings super-fast after using this tool.
- It requires a certain level of expertise to use this tool.
- These tools require regular sharpening.
Spokeshave and Drawknife: Which one is the Best?
To be honest, there is no direct answer. Which one will be best for you depends upon your situation and experience.
In Conclusion
We have laid out all the facts here. Now you know almost everything about these tools. However, we recommend you watch videos of using these tools before the final decision.
Good luck and happy woodworking.


