Table of Contents
- 1 8 Steps on How to Chisel Wood Properly
- 1.1 Step #1: Choose The Right Chisel and Hammer for The Wood
- 1.2 Step #2: Clamp Down the Wooden Piece Securely
- 1.3 Step #3: Start Paring with Both of Your Hands
- 1.4 Step #4: Cut At an Angle of 15-20 Degrees
- 1.5 Step #5: Hit Harder on the Wood
- 1.6 Step #6: Determine the Amount of Material
- 1.7 Step#7: Liver Outwards the Chisel to Remove Wood Chips
- 1.8 Step #8: Check, Inspect, and Oil the Chisel
- 1.9 A Few Safety Concerns
- 2 Frequently Asked Questions
- 3 In Conclusion:
Last Updated on March 2, 2021 by John Patterson
You bought one of the top wood chisels after searching for numerous top-quality brands.
But don’t know how to chisel wood, right?
No matter you’re a novice or a professional in craftsmanship, a top-rated chisel must be a day-to-day tool for you.
These tiny hand tools come to shape, re-shape, trim, bore, or almost any kind of hand-operated woodwork. You can even cut wood using a chisel.
So, it’s woodworking 101 to have a firm idea of how to use a wood chisel appropriately.
Especially, when it’s your first few times chiseling a wooden piece, you should strictly stick to the rule book.
If you’re a professional carpenter to teach you the steps, that’s the best way to learn it. But in case you’re all on yourself, we’re here to help you out.
Go through this 8-step guide which will make it simple and actionable to chiseling a wooden piece.
8 Steps on How to Chisel Wood Properly
Step #1: Choose The Right Chisel and Hammer for The Wood
There are a handful of chisel types and hammers to occupy them with. It’s not only about price and brands. Sometimes a quality cheap chisel (paid-link) can serve you for a lifetime.
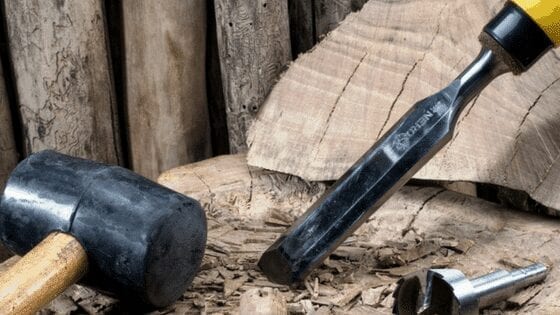
However, if you’re dealing with hardwood, get a metal hammer/mallet. If the wood is soft, you can go for wood, rubber, or plastic. This will prevent prior damage to the wood while chiseling.
Step #2: Clamp Down the Wooden Piece Securely
Before working with a chisel, the wooden job should be placed firmly with a quality clamp. The best practice is, however, to put it on an uneven surface and tighten the vice with a clamp.
As the surface area of clamps isn’t that much, it can create excessive pressure on a tiny portion of the wood. Especially for softwoods, this is dangerous. You can use another piece of plastic or wood between the clamp and wood. It will spread up the pressure onto a wider area.
Step #3: Start Paring with Both of Your Hands
The process of chiseling wood begins with pairing it with a chisel and bare hands. At this stage, we strongly recommend you to use both hands instead of one. Put one hand to guide the chisel, and another hand to provide the driving force for it.
If you need even more precise cutting than usual, you better use a brace to fix the guiding hand with the job. That will work as a fulcrum throughout the entire paring.
However, this whole process of paring wood gets better over time.
Step #4: Cut At an Angle of 15-20 Degrees
Set the chisel at an angle of 15-20 degrees. Make sure to keep the bevel side of the chisel upwards. This will prevent any cracks to build up in the wood.
However, creating an angle to cut the surface area of the wood is only to cut with the upper surface. If you have to make deeper cuts (like splitting the wood), you need to go through the next step.
Step #5: Hit Harder on the Wood
To make deeper cuts on the wood, you need more force than bare hands can provide. We recommend using a mallet to drive the chisel.
If you’re working on the hardwood, then using any kind of mallet won’t be an issue. But for some softwood, hard strikes of mallets cause the wood to split. We recommend avoiding using any metal hammer in this case. A hard-plastic-made hammer or wooden hammer would be a better option.
Step #6: Determine the Amount of Material
Cutting with a hammer requires some precise calculations. And one of them is to determine the amount of wood that you’re willing to cut out. Based on that, you need to angle the chisel and start hammering on a slow basis. Too much fast or hard hammering can split it out into an unwanted direction.
Step#7: Liver Outwards the Chisel to Remove Wood Chips
The process of shaping and re-shaping a wooden workpiece works by trimming out small chips of parts of the wood. And that’s done firmly with the help of the same chisel you’re cutting it with.
While trimming the chips, remember not to damage or break the wood fibers where you want the hole to be. Another piece of advice is to cut wood parts into small chunks.
Step #8: Check, Inspect, and Oil the Chisel
After the repetitive application of these steps above, you may get a shape from the job. As the chiseling is done, clean it off, inspect for any damage to the body, and sharpen it up again.
If you don’t have any further use of the chisel, we recommend applying a coat of oil. It will prevent rust from building up.
A Few Safety Concerns
Creating master-class wooden objects with a chisel takes a lot of practice and tactics. In the meantime, you are advised to adopt the primary safety concerns. To begin with, here is a list-
- First and foremost, keep the chisel sharp-edged. Because a dull chisel is quite a dangerous thing to deal with.
- While working on a block of wood with a chisel, always use a clamp. If the wood is of the soft type, use an additional plastic or wood in between the clamp and the wood.
- Don’t chisel with one hand; it’s most likely to create an accidental cut of slip-off from hand. Use both of the hands- one to guide the chisel, another to provide the driving force.
- Don’t cut the wood while the blade is pointing at you or anybody else. As these are tiny hand tools, they can often slip off and cause severe injury to anybody on their way.
- Once you buy a new chisel, break the sharp edges of the chisel with coarse paper or sandpaper. This will prevent cutting yourself while holding it up.
Frequently Asked Questions
#1: What is the correct angle for a wood chisel?
Answer: The right corner to start chiseling a wood is 15-20 degrees.
#2. How do you use a chisel safely?
Answer: Keep the bevel side of the chisel upwards, and use both of the hands to hold it.
In Conclusion:
Sometimes, the wrong side of the chisel for the wrong type of wood calls upon accidental mishaps.
Be double sure that you’ve got the right tool in hand.
A few practices are all you need to master on how to chisel wood.


