Table of Contents
- 1 Pocket Door Removal: Step-by-step Guide
- 1.1 Step 1: Remove the pocket door from the track
- 1.2 Step 2: Open up the wall
- 1.3 Step 3: Take out the old track to replace it with the new one
- 1.4 Step 4: Take out the remaining hardware
- 1.5 Step 5: Adjust the Replacement Hardware of the New Door
- 1.6 Step 6: Replace the Trim and Wall
- 1.7 Step 7: Put the New Pocket Door Pull
- 1.8 Step 8: Create an opening and faceplate
- 1.9 Step 9: Check the Fittings
- 2 How to Remove Pocket Door Without Removing Molding?
- 3 In Conclusion
Last Updated on April 24, 2021 by John Patterson
Pocket doors are quite a familiar part of modern homes. But sometimes, they get worn out, and you are in the essence of replacing it with a new one.
But when you get on track, the pocket door removal process seems not to be so easy. And you need help in case you’re new to such operations. For removing and installing a new one, you will need a top-quality pocket door hardware kit.
In today’s post, we’re going to explain the exact process on remove the pocket door from the track. We’ve split the post into two sections where we’ll be guiding you through removing the door with or without removing molding.
So, let’s start.
Pocket Door Removal: Step-by-step Guide

Step 1: Remove the pocket door from the track

The first and foremost step of removing the pocket door is to remove the trim. Start with pulling it in the direction towards you to pull the rollers from their place. The tool that you have to use in this place is a quality stiff putty knife. If you don’t have such a knife, you can use a pry bar instead.
Step 2: Open up the wall
After removing the trims, there will still be some screws on the track, and you need to remove them all. In this regard, you need to make an opening on the wall. Use a stud finder to locate the internal frameworks and mark that with a pencil.
Afterward, you need to cut the opening using a wallboard saw. Once done, you have to create space to house the screws or drilling machines. Make sure that there is not any damage to the cutout.
Step 3: Take out the old track to replace it with the new one
There is a hidden part inside the track of your pocket doors. Access that portion and remain all of the screws. That will eventually let you pull out the track.
Step 4: Take out the remaining hardware
The rest of the hardware will include a roller that can be found right on the door panel. After unscrewing all the screws, you should be able to take out that roller.
Now, place the new hardware in the place of the old one, which is also called re-hanging the door. The tool that you need to do is a pry bar and a shim. These will help you to hold it at the place.
Step 5: Adjust the Replacement Hardware of the New Door
We’re into the next stage now, where you need to place the new hardware. In the case of new pocket door hardware, you may not find it perfectly suitable for the door dimension. Try to adjust the dimension accordingly. There are instructions provided by the manufacturer, and that’s where you will find the help.
Step 6: Replace the Trim and Wall
So far, you should have created space and hardware to set up the new pocket door. Before that, you need to replace the trim, if you want your trim to be unique.
Along with the trim, you have some damages to the wall that you might like to replace. Mainly, replace the access door that you have just cut on the wall.
Step 7: Put the New Pocket Door Pull
To get done with this step, you need to have a pocket door pull that matches the exact size of the previous one. Fill the old holes and use wood filler to create an entirely new surface to work on.
Step 8: Create an opening and faceplate
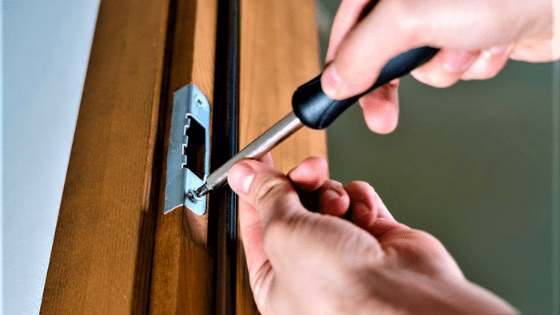
To operate with the pocket doors properly, you need to create a new latch. The tools that you will need are- a Forstner bit and a sharp utility knife. With the Forstner but, you have to drill a series of holes. And with the top-rated utility knife, you need to set the latches in place.
Step 9: Check the Fittings
We are done with the process of placing a new pocket door in the place of the old one. Now, check whether the dimensions are matched precisely or not. If you find any mismatch, you may look for adjustments where necessary.
If you have gone through the previous steps of removing a pocket door and setting a new one up, you might have noticed that pulling the trim out is one of its very first steps. But there are some cases when you don’t want to do that.
Especially when you don’t want to take out the trim, and you don’t have a new one to replace that.
Therefore, we are going to note down the steps where you don’t need to replace the old trim to set a pocket door up. Let’s go through-
How to Remove Pocket Door Without Removing Molding?

Step 1: Remove the Jamb Stops
Here at the starting point; you need to remove the jamb stops. Jamb stops are located at both head and the J-shaped single track.
By the way, remove jamb stops only from that side of the door which is faced towards the closed side of the entire track. If you are lucky enough, the stops which are attached to the screws will merely be backed out.
Step 2: Disengage the roller from its place
If you are successfully done with the previous steps, take off the stops. After that, check whether you can swing the door outright from the bottom of it. You should also be able to lift the door slightly. That will eventually disengage the roller back.
Step 3: Continue with setting up the new door
If you’ve reached this far, that’s great. Now follow the previous section and find instructions regarding placing the new pocket doors. Everything should be the same as we’ve described in the last section.
In Conclusion
Great! You’ve just gone through the steps in this how-to remove a pocket door guide to place the new pocket door in place of the old ones. We want to remind you that taking off the pocket door without the trim might lead to slight damages to the frame itself. Be ultra-careful and take a helping of an expert if necessary.

